
7.4 KiB
Desktop Quick Start
This walkthrough takes you from installation to a working session.

1. Install and open the app
Download the package for your platform from GitHub Releases. Detailed package names and platform notes are in the Installation Guide.
On first launch:
- macOS may show the standard downloaded-app confirmation. Official releases from
v0.4.3onward are signed and notarized. - An unsigned Windows build may show SmartScreen. Confirm that the package came from the project’s GitHub Release before choosing More info → Run anyway.
- Linux AppImage users may need FUSE, depending on the distribution.
2. Confirm the data location
Desktop uses ~/.claude by default for sessions, providers, settings, Skills, Agents, memory, tasks, traces, and adapter state. Most users should keep this default. If you need portable or isolated storage, select an explicit custom directory in General settings and restart when prompted.
Do not point automated tests or temporary experiments at your real user data directory.
3. Connect a model provider
Open Settings → Providers. There are four main paths:
| Path | Use it when |
|---|---|
| Claude official login | You want models available to your Claude account |
| ChatGPT official login | You want the current GPT and Codex catalog available to your account |
| Grok official login | You want the xAI model catalog available to your account |
| Custom provider | You have an Anthropic-compatible or OpenAI-compatible endpoint and API key |
Custom providers can use anthropic, openai_chat, or openai_responses format. Presets are editable, and the final model list still depends on the endpoint.
Use Test connection before starting a session. Never paste API keys into chat messages or screenshots.
4. Create a session
Select New session, then choose:
- a project directory;
- the current working tree or an isolated Worktree when Git options are available;
- a model and supported reasoning effort;
- a permission mode.
Sessions are bound to their working directory. The sidebar groups history by project and time, and open sessions can be kept in separate tabs.
5. Choose a permission mode
The current desktop supports five modes:

| Mode | Behavior |
|---|---|
| Ask | Requests approval before protected operations |
| Accept Edits | Automatically accepts eligible file edits, while other protected actions can still ask |
| Plan | Lets the model investigate and propose a plan without carrying out normal implementation work |
| Auto | Reviews operations automatically and allows or blocks them according to the Auto policy |
| Bypass Permissions | Skips eligible approval prompts; explicit denials and tools that require user interaction still apply |
Auto and Bypass Permissions expand what can run without a click. Read the confirmation dialog and use them only in a project and environment you trust. The mode cannot be changed while an active turn makes that unsafe.
6. Chat and review work
The composer supports:
- text and multiline input;
- pasted images, drag-and-drop, and file selection;
/commands;@workspace file search;- model and effort selection when supported.
While a turn runs, review tool calls, permission requests, tasks, SubAgents, teams, sources, changed files, and previews. Use the workspace panel for files and diffs, and the activity panel for background work.
7. Explore the workspace
The workspace can search the complete project without requiring every directory to be expanded first. Packaged desktop builds include the appropriate ripgrep binary.
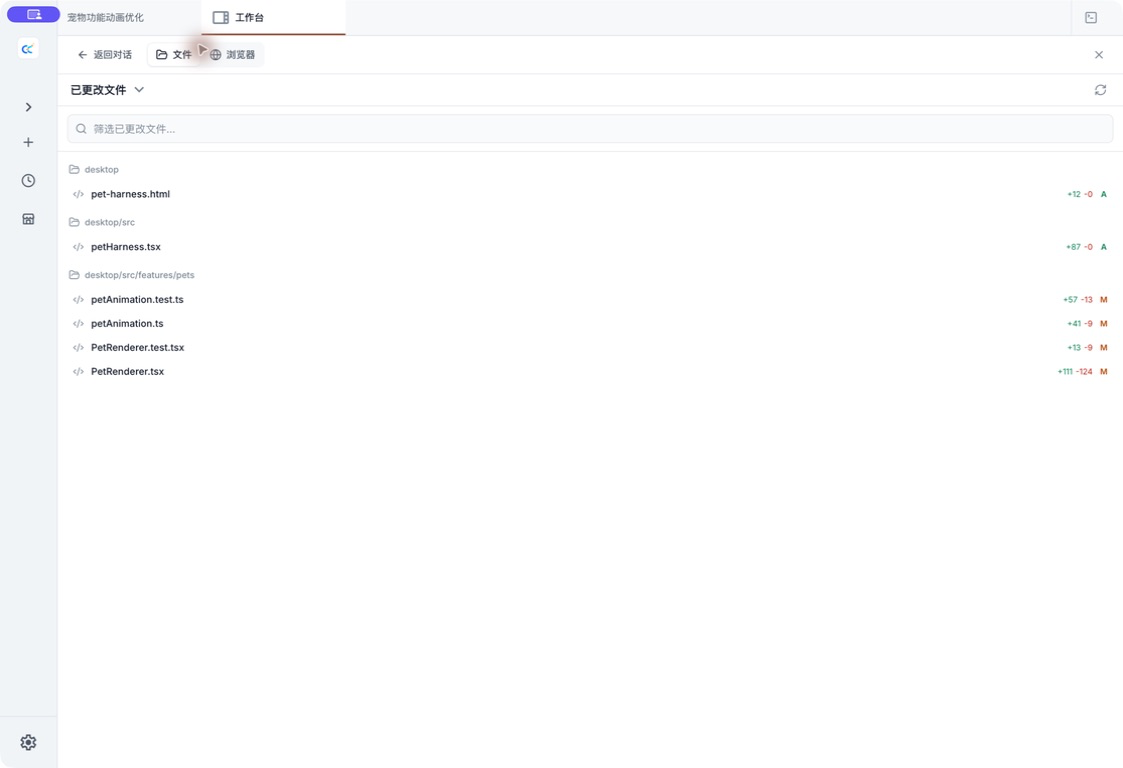
You can:
- preview files and local attachments;
- open files with the system default app or a configured editor;
- select one or several diff lines and send review comments back to chat;
- inspect the current branch, Worktree, and changed-file summary;
- open the embedded terminal and browser preview.

8. Manage Skills, Agents, and pets
Install Skills
Skills shows installed Skills and a marketplace for discovering, reviewing, installing, and removing supported third-party Skills. Review source and risk information before installation.

Create or edit an Agent
Open Settings → Agents, then select Create Agent.

- Choose User scope to reuse the Agent across projects, or Project scope to keep it with the current project.
- Add a name, description, and system prompt that clearly define the Agent's responsibility and expected output.
- Inherit the main session model and effort, or select a model and supported effort specifically for this Agent.
- Keep all tools, disable tools, or choose searchable built-in, MCP, and custom tool rules.
- Save the Agent. User Agents are stored in
~/.claude/agents/; project Agents are stored in the current project's.claude/agents/.
Built-in, plugin, and policy Agents remain read-only. See the Multi-Agent Usage Guide for definition formats, precedence, and inheritance.
Turn on the desktop pet
Open Settings → Pets and enable Show desktop pet.

- Choose Dada, Huhu, Bubu, or Huihui.
- Adjust the size and animation setting.
- Enable the active-task panel if you want it to open automatically while a task is running. The panel remains hidden when no task is active.
- Hover for a small reaction, click the pet to focus the main window, or drag it to another position. Right-click the pet to close it; return to Settings → Pets to show it again.
Select Add pet to make a lightweight local animation from a transparent PNG or WebP, or import a supported 1536×2288 v2 animation atlas. The AI full-animation option is currently unavailable. Pets run only in the Electron desktop app and are not supported in H5.
Follow the complete Desktop Pet Guide for custom-image requirements, task states, and interaction details.
9. Optional remote access
- Use IM integrations for explicitly paired private-chat users.
- Use H5 Access only on a trusted LAN or behind a reverse proxy you control.
- Local loopback Web UI access is separate from H5 and does not grant remote access.
10. If something fails
Open Settings → Diagnostics to inspect the desktop runtime, local index, sidecar, providers, and recoverable state. Read FAQ before manually editing stored JSON.